
Unity Lessions #1 - Simple character controller
In this lesson, we will create the simplest and most primitive character control in just a few lines using the CharacterController.
First, let's create a project and add a simple Plane to the scene at zero coordinates (0, 0, 0).
After that, let's create a "player" - create an empty GameObject in zero coordinates, give it the appropriate name "CubePlayer". We put a regular Cube object inside, remove the Box Collider component from it as unnecessary and, if desired, change the material to whatever you like.
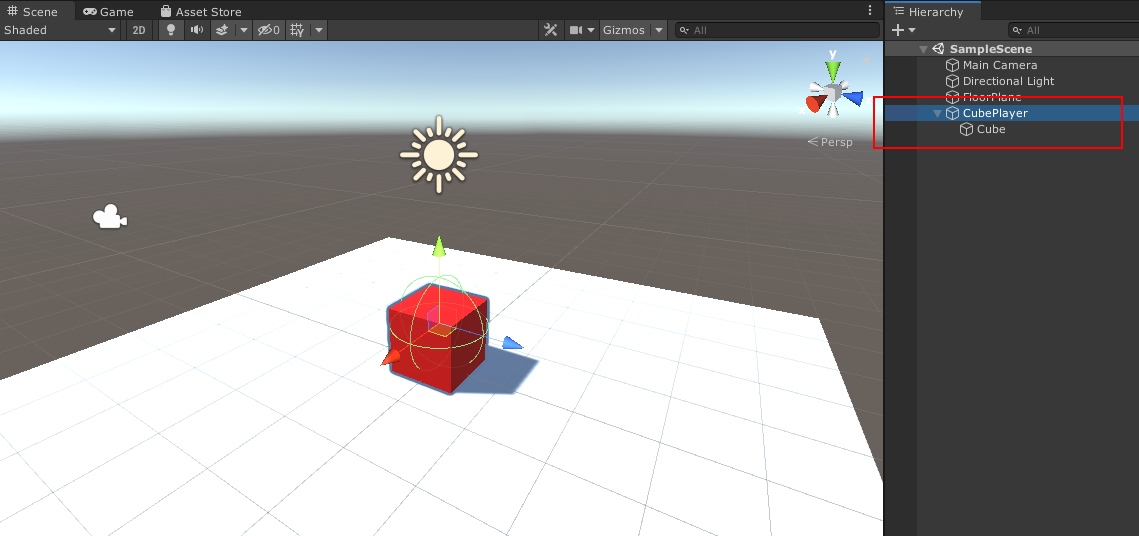
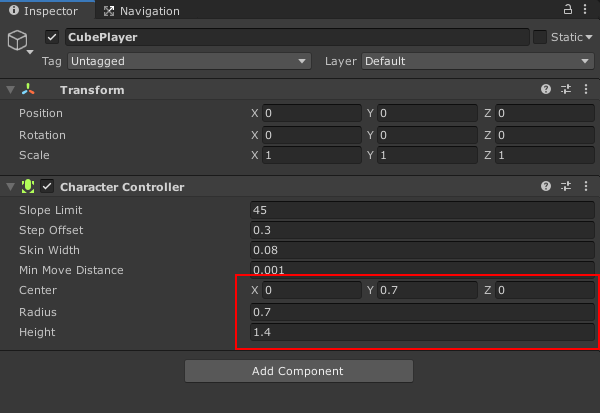
Add the CharacterController component to the CubePlayer object. This time we set the dimensions to the character as a ball - i.e. height = radius * 2, and the center is shifted up by a radius.
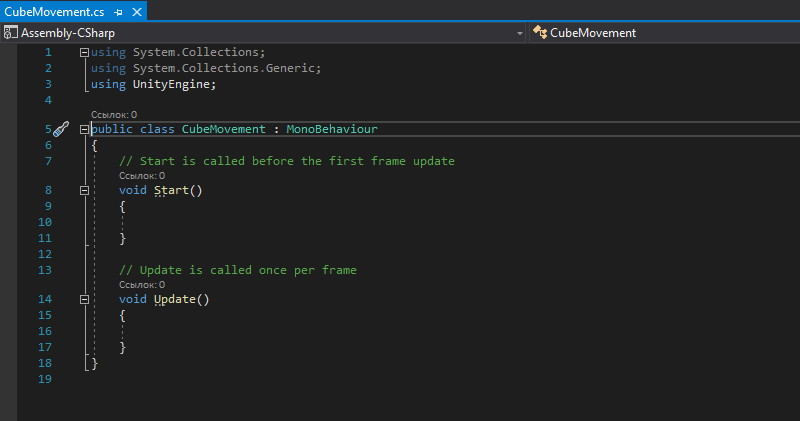
Now let's make control script. To do this, create and add a new script and name it "CubeMovement". After creating the script, go to the code editor.
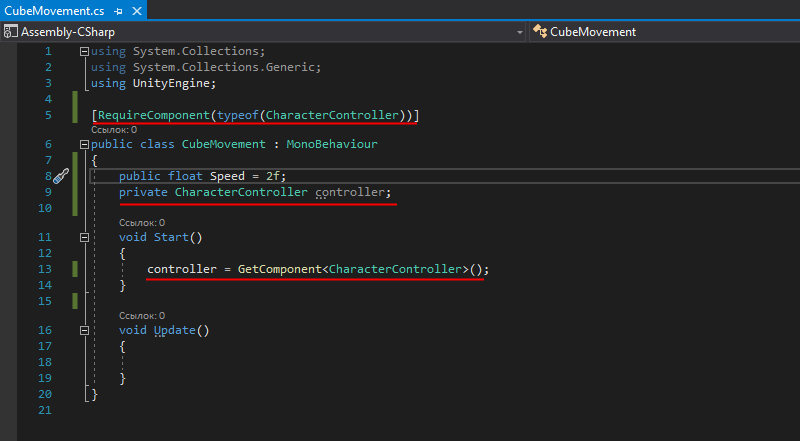
Above the class declaration, add the RequireComponent parameter so that the unit understands that the script needs the CharacterController component - if it is not on the object when the script is added, the unit will add this component to the object automatically.
In the body of the class, at the very top, we declare the fields we need. The public parameter Speed - to control the speed of movement and the hidden field controller, to save the link to the controller of our character.
Then, at the start of the script, we take a link to the character controller component as described in the Start () method
Now we fill in the character control code in the Update method. As a reminder, Update is called every frame. Next, I will explain what we are doing here.
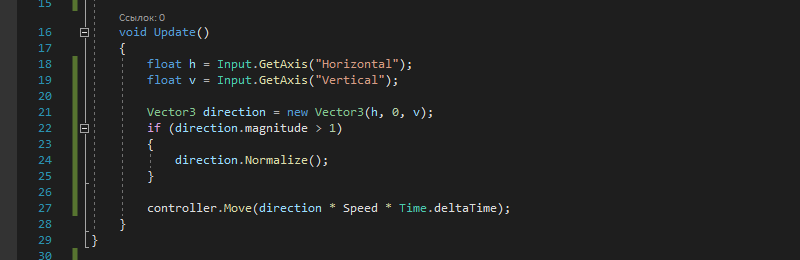
At the beginning of the method, we take input parameters from the horizontal and vertical axis. The axes are defined in Unity's input parameters as Horizontal and Vertical, and take data from the WASD buttons, arrow keys, and motion joystick from the gamepad. The values along the axes are in the range [-1; 1]. For the current task, these axes will be sufficient.

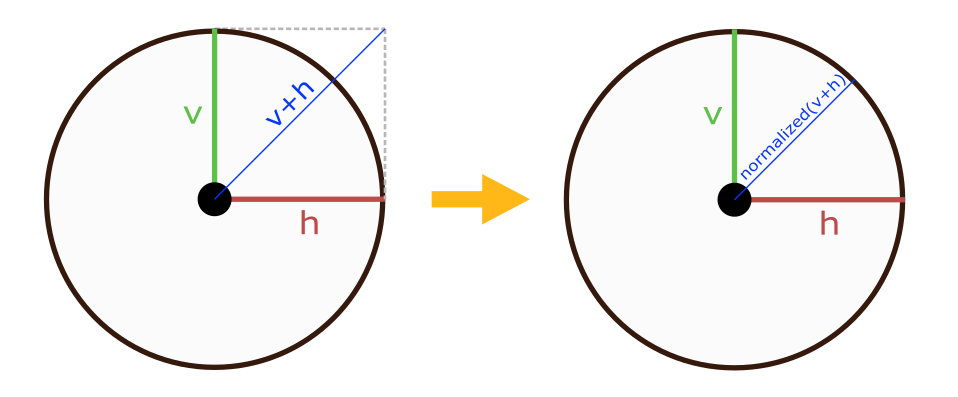
Then we make a direction vector for the movement of our character. We use the horizontal axis as the X parameter, use the vertical axis as the Z parameter. After that, we check the size of the direction vector and if its length is more than 1, then we normalize it (bring it to a length of 1).

Why do we perform normalization? The thing is that the result when adding two unit directions (if we immediately press A + W or A + S, etc.) will be a vector longer than 1 and as a result the character will move diagonally faster than in one of the directions. Normalization prevents the direction from going beyond one, so the character will move in all directions at the same speed.
In the end, we actually apply the resulting direction and speed to the character's controller.

The CharacterController has two methods for applying motion. "Move" and "SimpleMove". In short, the "Move" method gives information about the character's collisions and takes the speed per frame as a parameter. The "SimpleMove" method takes the speed of movement in a second and controls gravity itself. In our example, this is not important, so we use the Move method.
We return to Unity, wait for the script to compile and start playing the game in Unity. As a result, we get the result as in the video.
That's all, I hope I helped! Write comments if you have any questions related to the lesson.